
Yesterday, my friends ask me to install Windows XP on his new Acer Aspire 4520 . But when I tried to install win xp , this laptop cannot detect the harddisk... Ups... this is happen again like when I tried install windows XP to Aspire 4710.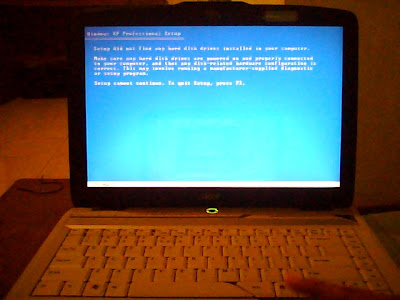
Should I use nLite to integrate ahci sata driver like this tutorial ?
No! because in Acer Aspire 4520 we just need to change "SATA mode" setting :
1. Turn on aspire 4520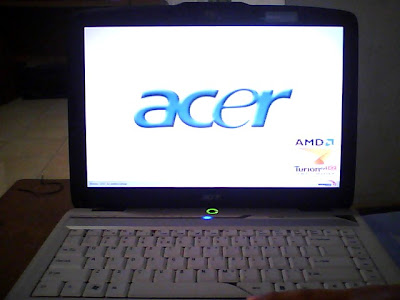
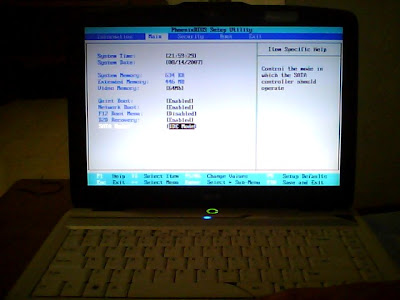
2. Press F2 to enter bios, -> "Main" -> select "SATA mode"
3. Change AHCI Mode to IDE Mode
4. Finally, windows xp will detect the HDD.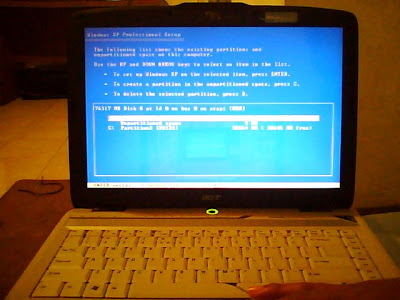
Driver for Windows XP :
UPDATE :
169.21_forceware_winxp_32bit_english_whql.exe (VGA) December 19, 2007
14.10_nforce_630a_winxp_english_whql.exe (Chipset)
Atheros wireless win xp driver (WiFi)
Other drivers from Acer CD is compatible with windows XP (except CIR - I still have problem with it) 
sorry for my english.. im still learning ;)
UPDATE :
Download complete driver acer aspire 4520 : Download link
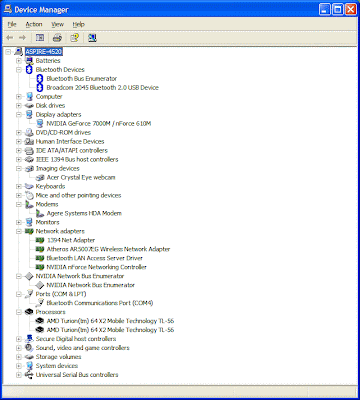
This is my device manager :)
Cara menginstall
1) nyalakan komputer
2)del
3)advanced bios features(enter)
4)firs bootdevice cd room
5)ESC
6)masukkan CD
7)ESC-QUIT-YES(Y)(enter)
8)boot fromCD ROOM
9)pili pilihan yang bertujuan untuk mempartisi yaitu no2.start komputer with cd rom support(enter) lodding.
10)Pada PROGRAM DOS ketik:F DISK(A:\)f disk enter
11)Tekan (y)enter
12)Lihat partisi yang anda telah buat pada menu no 4
13)enter choice:(3)enter untuk mendelet exstended&primari
14)enter choice:(1)enter untuk mengaktifkan partisi
15)isikan prosentase pada partisi sebesar 50%
16)pilih no2(enter choice:(2)enter untuk exstended)
17)buat satu buah logical
18)setelah itu restart komputer
19)kemidian lakukan perintah dos berikut :
e:dir,CD WINDOWS98,DIR CD SETUP
e:DIR*format.*
e:format c
e;format d
20)setelah itu beri nama partisi
21)ketik:setup\?
22)ketik:setup
23)ketik continue&next
24)klik user name next
25) i accept agreement-use-next
26)selesai.
skip to main |
skip to sidebar
Popular Posts
-
Catatan: Segala cara yang dituliskan di artikel ini adalah hasil dari uji coba, yang telah penulis lakukan, dan diterapkan di lebih dari sa...
-
Untuk mengerjakan terminasi, seorang terminator perlu bekerja dengan presisi dan teliti, mengingat yang ditangani adalah kabel fiber optik...
-
Disini kita akan membahas Engenius 1220 r , termasuk keluarga senao yang terkenal handal dan stabil di kelasnya (2.4Ghz) Pertama ka...
Category
- ANTI VIRUS (13)
- DOWNLOAD (8)
- HARDWARE (10)
- NETWORK (24)
- SISTEM OPERASI (14)
- SOFTWARE (16)
- TIPS N' TRIKS (12)


0 komentar:
Posting Komentar